This is the third post on this topic. The entire series consists of these posts:
- Part 1: On-premise deployments with Azure DevOps – Introduction
- Part 2: On-premise deployments with Azure DevOps – Backups
- Part 3: On-premise deployments with Azure DevOps – Database Migrations (this post)
- Part 4: On-premise deployments with Azure DevOps – Web Applications
- Part 5: On-premise deployments with Azure DevOps – Windows Services
This description uses DbUp as the tool for deploying migrations. For a detailed description check out Database migrations with DbUp.
This post will cover how the migration process can be implemented inside a task group, which can be used across multiple stages inside a multi-environment release.
Task Group
1. The first task group creates a backup of the project. See Part 2 of this series for details
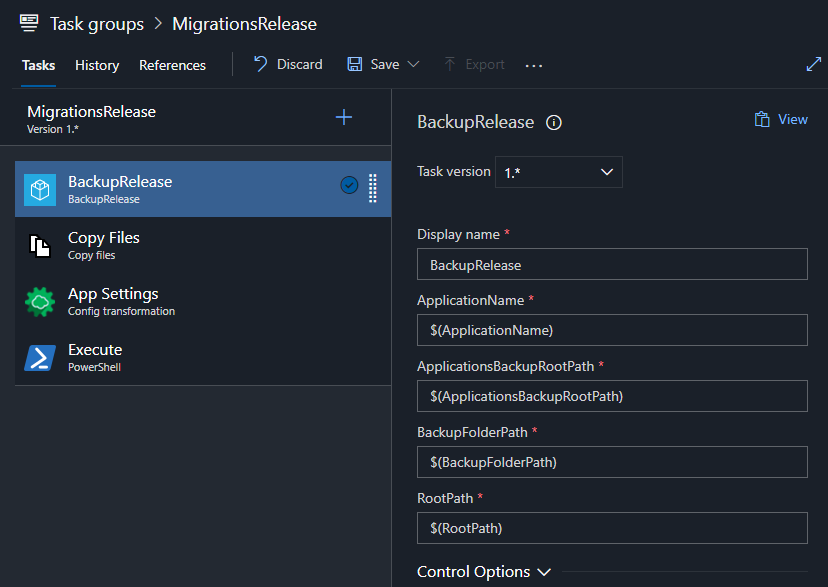
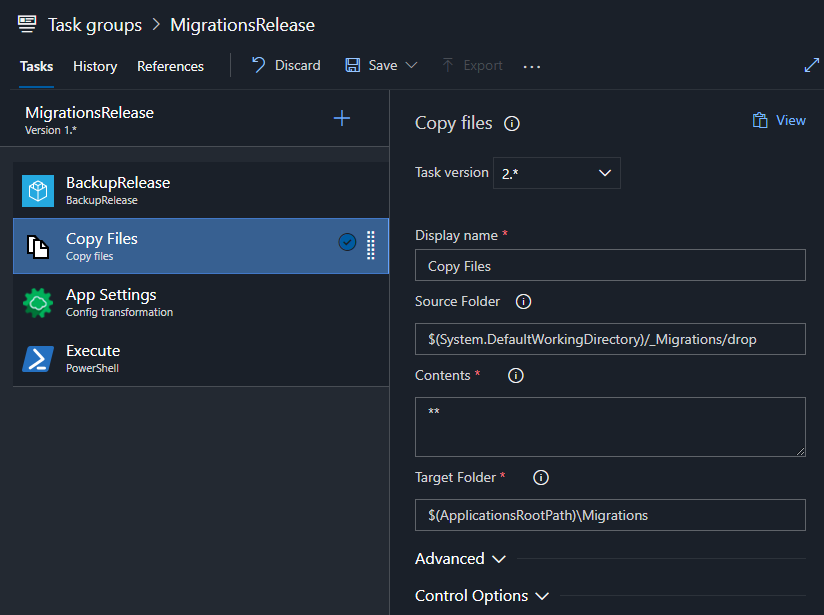
2. The second task copies the project files from the build artifact into the applications folder.
3. The third task replaces the connection string and environment name with release variables (ConnectionString and EnvironmentName are the variables).
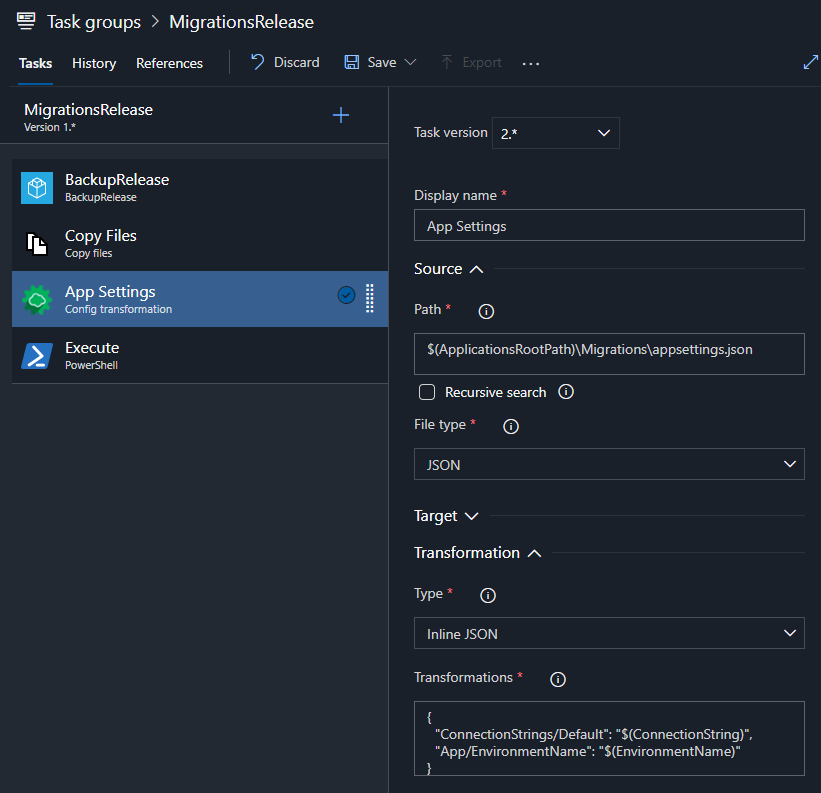
This is done using the Magic Chunks extension that can be installed into DevOps.
4. The fourth task is the one that actually executes the migrations using Powershell.
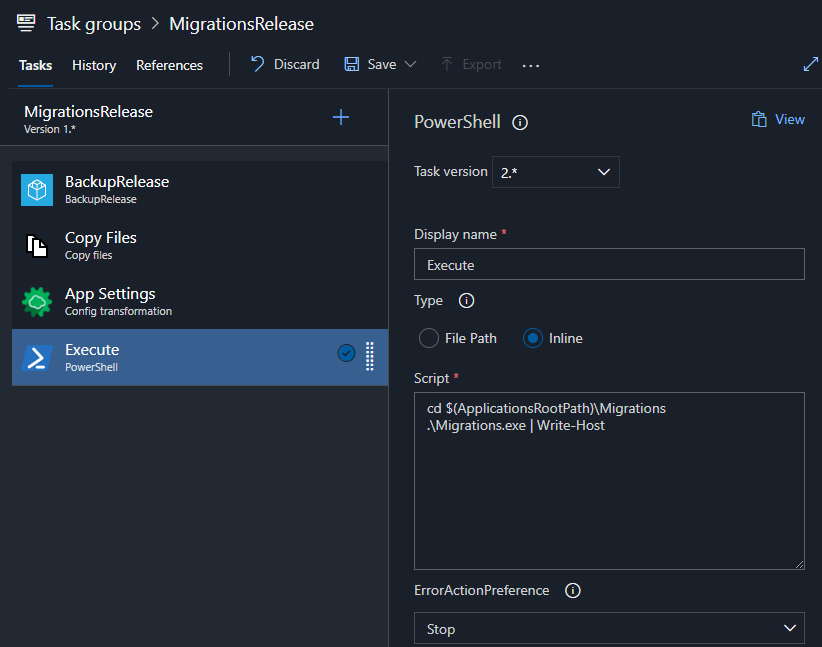
Replace Migrations.exe with the executable name from your migrations project (for example if you have been using the sample project described in the post mentioned above, the executable would be DbUpTutorial.exe)
