This is the first post on this topic. The entire series consists of these posts:
- Part 1: On-premise deployments with Azure DevOps (this post)
- Part 2: On-premise deployments with Azure DevOps – Backups
- Part 3: On-premise deployments with Azure DevOps – Database Migrations
- Part 4: On-premise deployments with Azure DevOps – Web Applications
- Part 5: On-premise deployments with Azure DevOps – Windows Services
Using Azure DevOps when your project is hosted entirely in the cloud is the ideal approach, but what if you have projects hosted in on-premise servers and it is either not possible to migrate or you just want to use the benefits of Azure DevOps like source control, ticketing system, automated builds and releases without having to move your entire infrastructure to the cloud? The answer to this is on-premise deployments. Here is how this can be achieved.
Create deployment groups
A deployment group, like its name says, is a way to group on-premise servers (the terminology for servers is in the scope of deployment groups is targets). In this description a single deployment group will be used and environments (test, staging, production, etc) will be differentiated using tags. Another approach is to create multiple groups, one for each environment.
Go to Pipelines -> Deployment groups and add a new group.
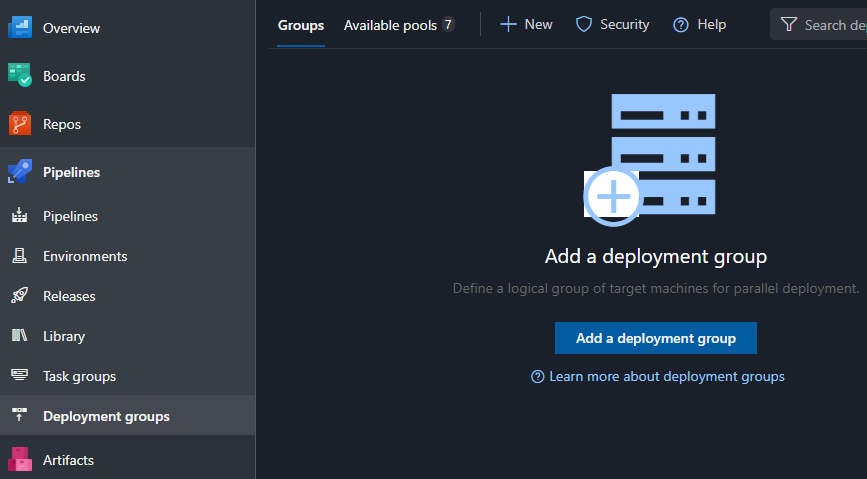
Detailed documentation can be found here.
Register deployment group agents
A deployment group agent is a Windows Service that links an on-premise servers to Azure DevOps.
1. Check prerequisites here. (! only the prerequisites section is relevant to this description, the rest is related to setting up an agent to build projects on a local machine instead of using the agents hosted Azure DevOps agents, which are different than agents used to deploy projects to on-premise servers).
2. Open the deployment group and copy the PowerShell installation script to the clipboard using the button below it.
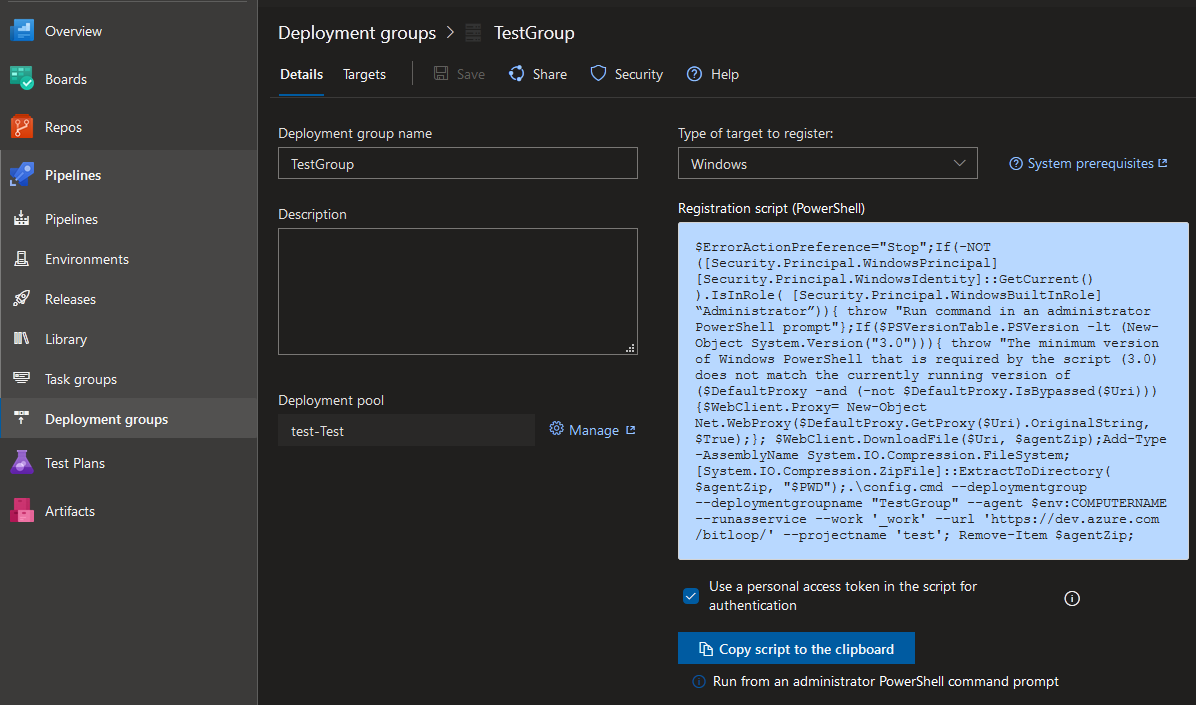
3. Log in to the on-premise server
4. Open a Powershell console with administrator privileges
5. Paste and run the script. It should install the agent and link it to the DevOps deployment group. When it asks to assign tags, just skip that step as it can be done later.
6. The newly registered targets (servers) should appear after reloading the Deployment groups page.
7. Assign tags. The below screenshot shows a possible setup for two environments (staging and production) where each environment has two targets (one for hosting apps – websites and windows services and one for databases). Another approach is to create a deployment group for each environment, in which case there is no need to add environment-specific tags so the required tags will be service, web and database.

Detailed documentation can be found here.
Create the pipeline
If you haven’t created a build pipeline before, head over to the documentation here. There is nothing special that needs to be done for on-premise deployments.
Create the release
If you haven’t created a release before, head over to the documentation here. This blog post deals only with the specific configuration needed for on-premise releases.
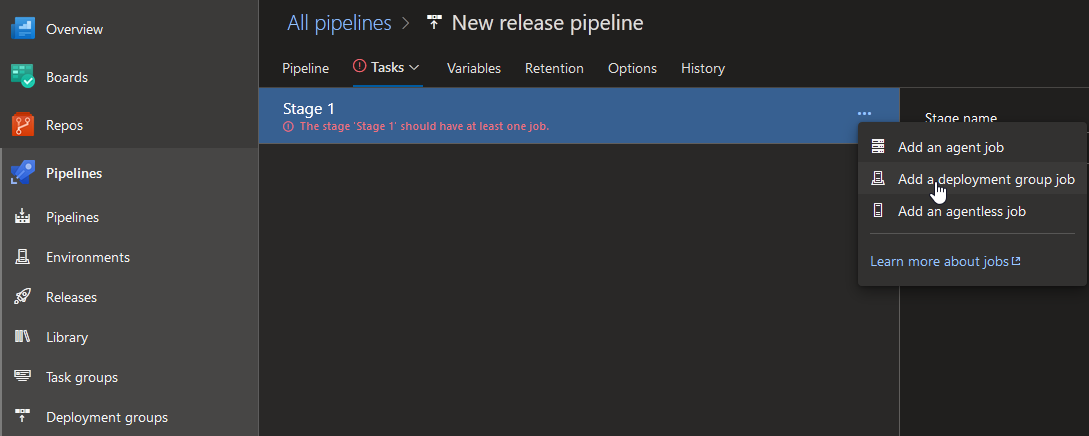
1. Create a new release. It will likely create an Agent job by default. This is for deploying to Azure, but it is not needed here. Delete it and add a Deployment group jobinstead.
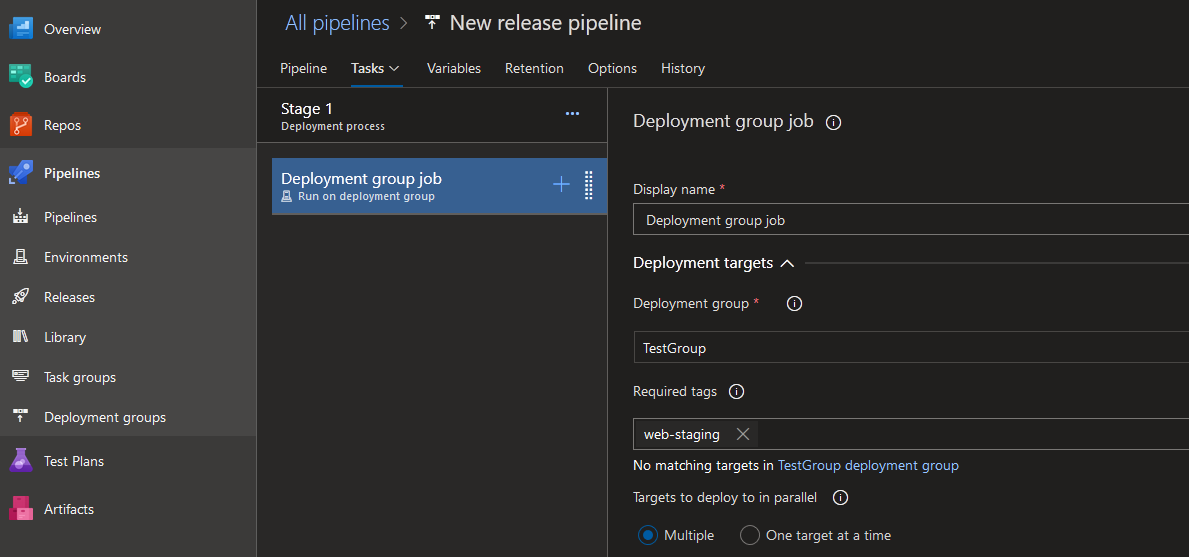
2. Select the deployment group and add the required tags. A release will run on a target inside a group only if it has the required tags. For example if a job’s purpose is to deploy database migrations, it should run only on the target that hosts the database and it should ignore the other targets that are in the same group.
3. Next step is to add the required tasks to do the actual deployment. This will be covered in a future post where we’ll be looking at deploying web apps into IIS, Windows Services and database migrations using DbUp.