This is the fourth post on this topic. The entire series consists of these posts:
- Part 1: On-premise deployments with Azure DevOps – Introduction
- Part 2: On-premise deployments with Azure DevOps – Backups
- Part 3: On-premise deployments with Azure DevOps – Database Migrations
- Part 4: On-premise deployments with Azure DevOps – Web Applications (this post)
- Part 5: On-premise deployments with Azure DevOps – Windows Services
This post will cover how a web application can be deployed into IIS inside a task group, which can be used across multiple stages inside a multi-environment release.
Task Group
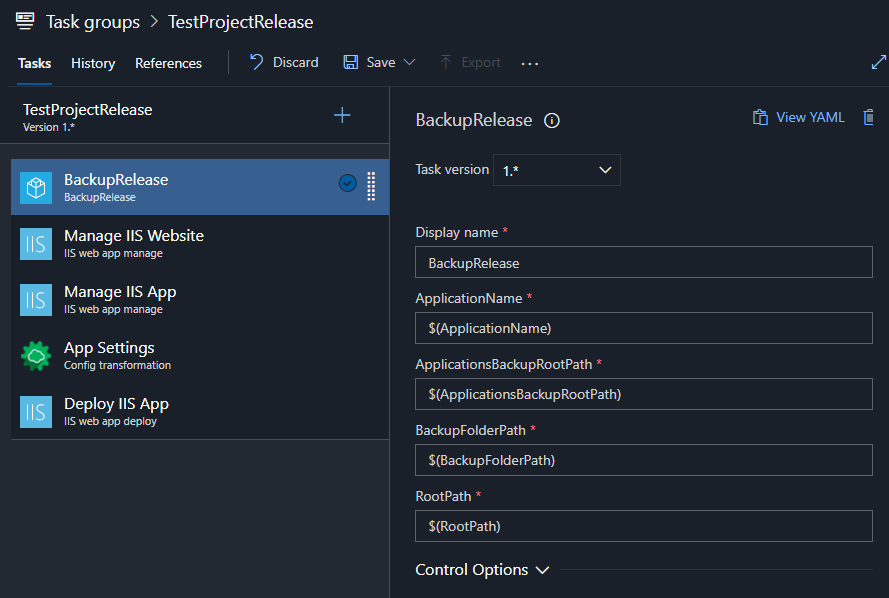
1. The first task group creates a backup of the project. See Part 2 of this series for details
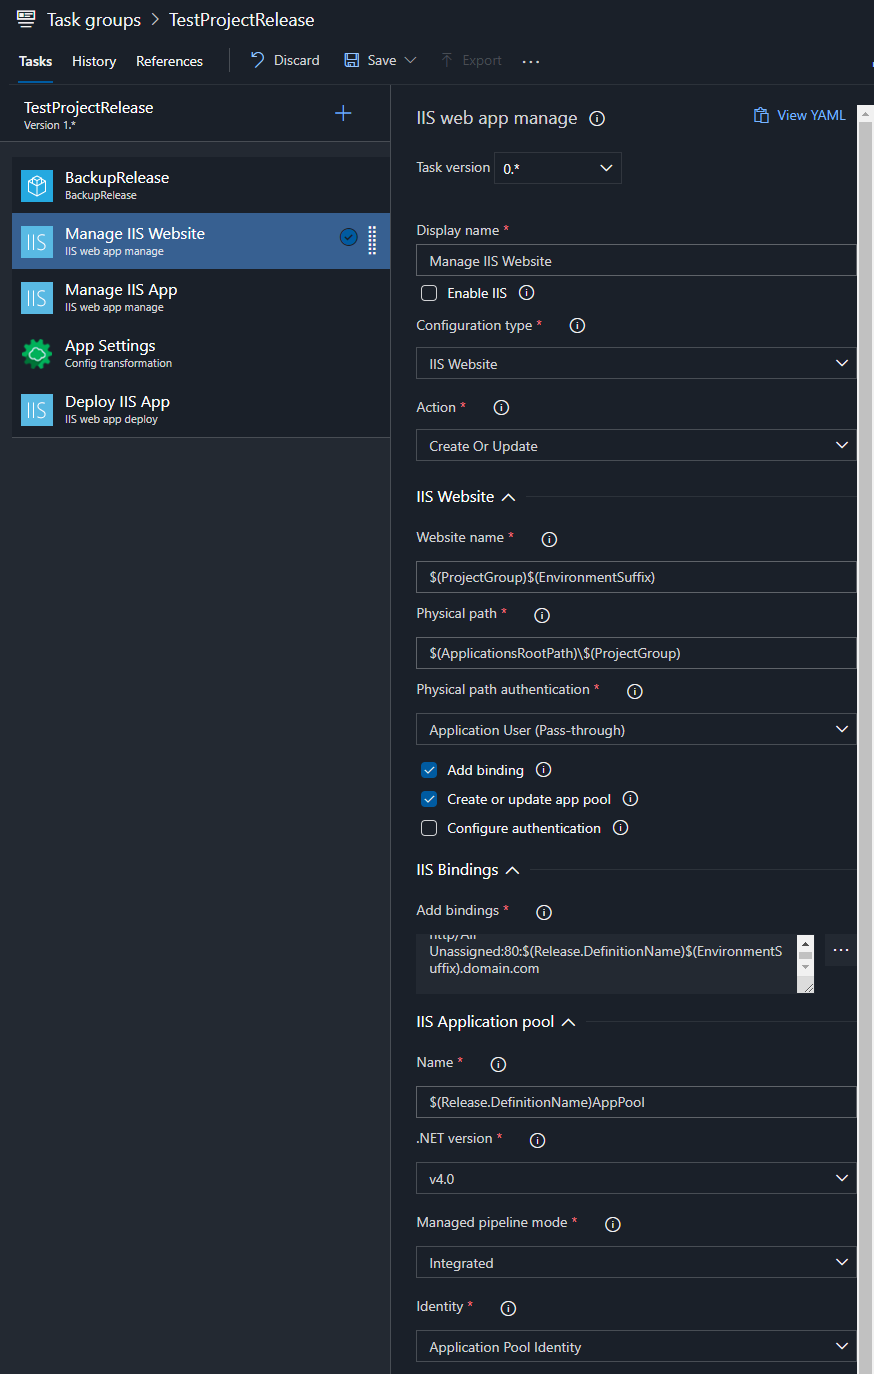
2. The second task creates or updates an IIS Website. There are many options for this task, like adding bindings, creating application pool, authentication. Here is an example:
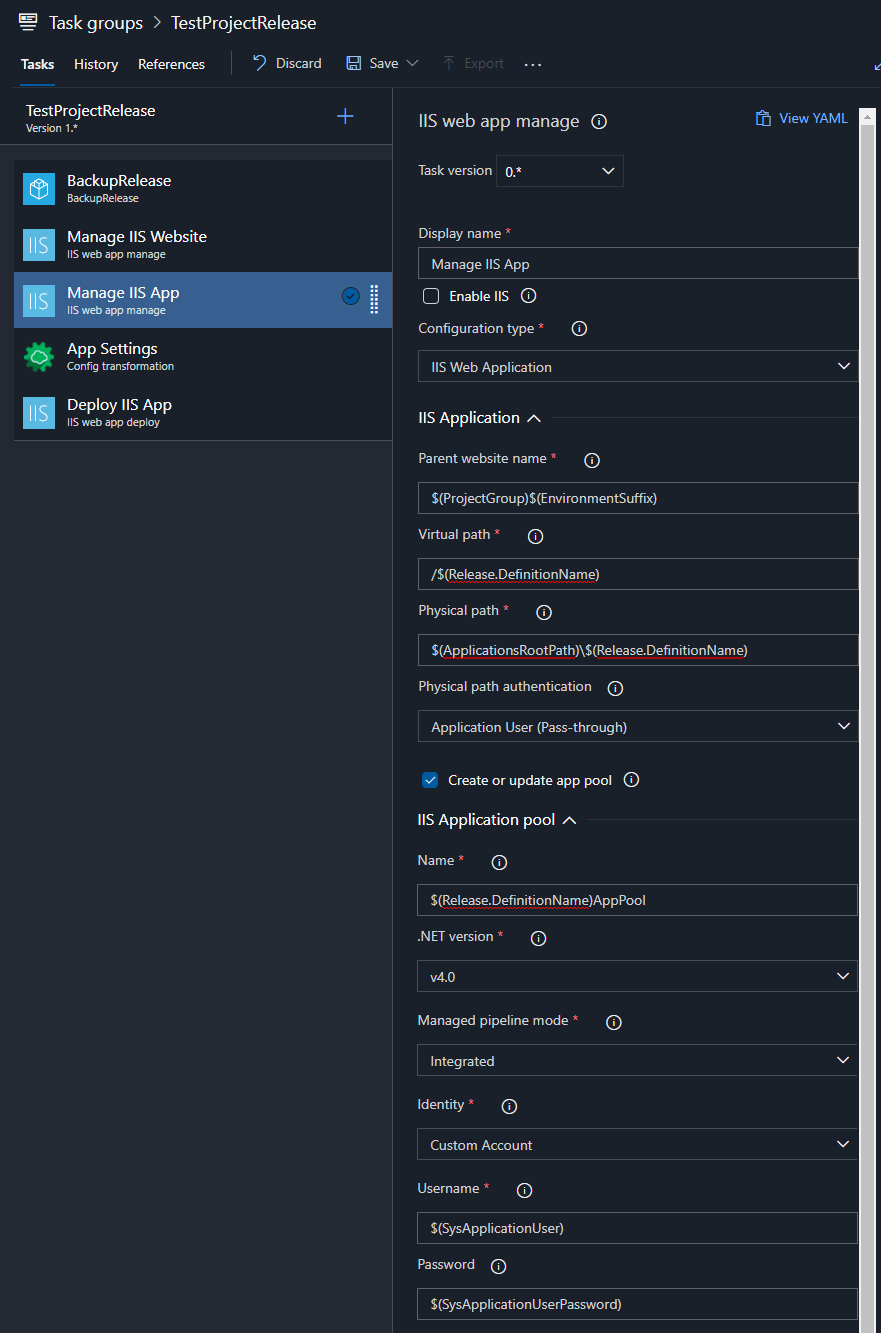
3. The third task creates an IIS web application (virtual path) under the IIS Website created in the previous task.
Notes
- This same approach can be used to create web applications under the
Default Web Site, in this case theParent website nameshould be ‘Default Web Site’. - If there is a single project to be deployed in the IIS Website, this step can be skipped and instead deploy directly into it.
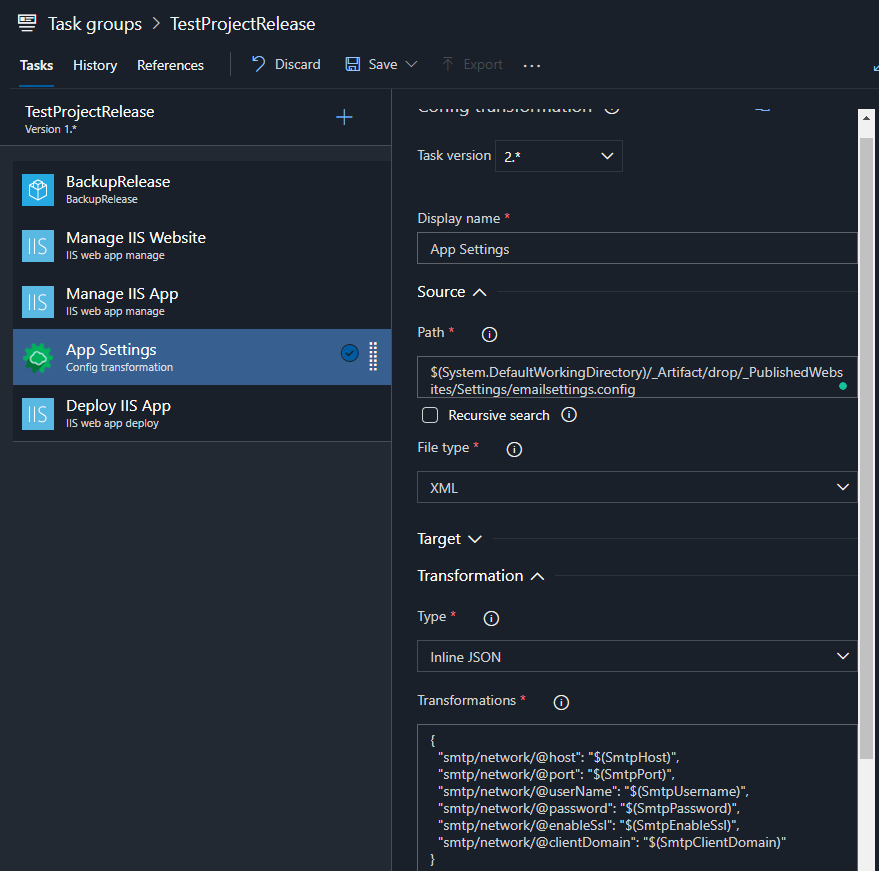
4. The fourth task replaces environment specific settings using release variables. This is done using the Magic Chunks extension that can be installed into DevOps. In Part 2 of this series, the extension was used to replace values in a JSON config file, but it can also be used with XML files.
In this case, the task replaces SMTP settings, but it can be used with any type of XML file.
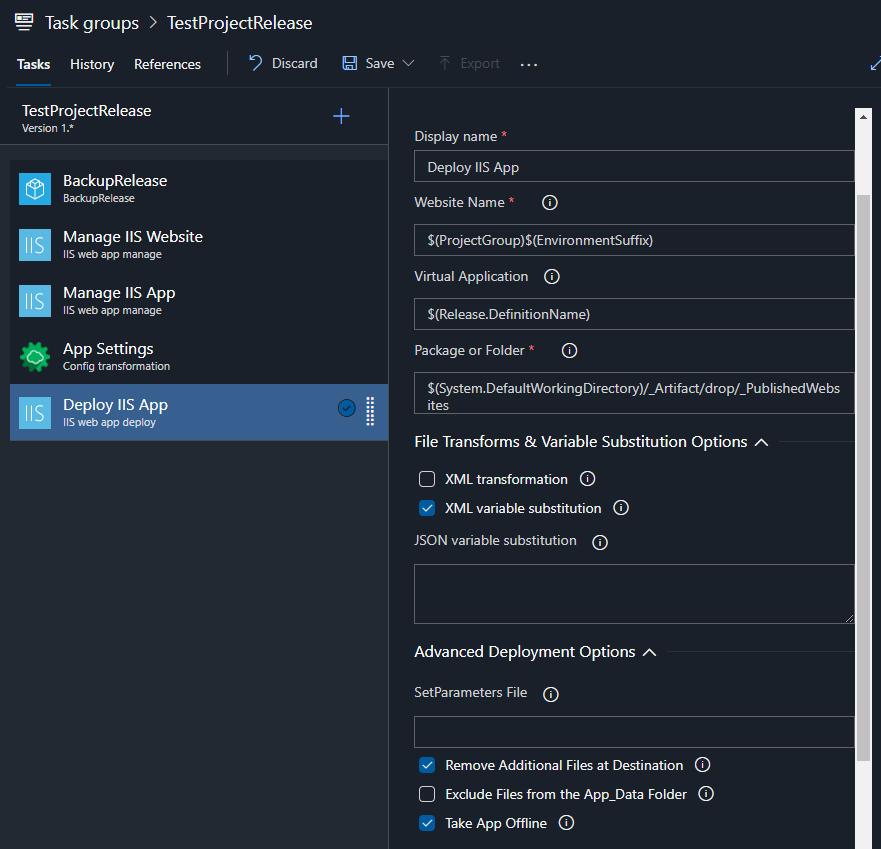
5. The fifth task is the one that does the actual deployment into the IIS Web Application created in step 3.
If there is a single project to be deployed, the Virtual Application field can be left empty, in which case the deployment will be made into the IIS Website.
Notes
- By checking the
XML variable substitionoption, variable substations will be applied in default configuration sections from web.config (applicationSettings, connectionString). for custom substitutions the approach in Step 4 can be used - By checking the
Remove Additional Files at Destinationoption, files that are part of the webapp but are not part of the artifact anymore that is being deployed, will be deleted. For example if a NuGet package was used in a project, then removed at a later date, the related libraries will be deleted, otherwise those will be loaded and could cause issues. This option should not be activated if any kind of generated files or user uploaded files are being stored in the project as those will be deleted. - Sometimes the files are locked by IIS, that’s why the
Take App Offlineoption should also be checked.
